The Big Cleanup!
Hey folks, I’m finally back with an update! I had intended to post one on Halloween but I figured I’d just hold off on it until I had finished doing some more under-the-hood work first.
Not long ago I came across some articles about UE4 optimization during my break and figured I’d give it a read just for something to do. I already had a solid workflow (or so I thought) and I knew what I was doing. You can imagine how surprised I was when I found out that I was very, very wrong!
When I moved onto UE4 I held onto certain methodologies for creating 3D art. As it turns out, some of these methods were actually very bad habits and techniques (this is what happens when you’re mostly self-taught and don’t do a thorough job of learning)
I often had certain problems when importing some of my meshes into UE4 but I didn’t realize it was because of something I was doing wrong. I always assumed it was just a bug in the engine and just tried to find a workaround.
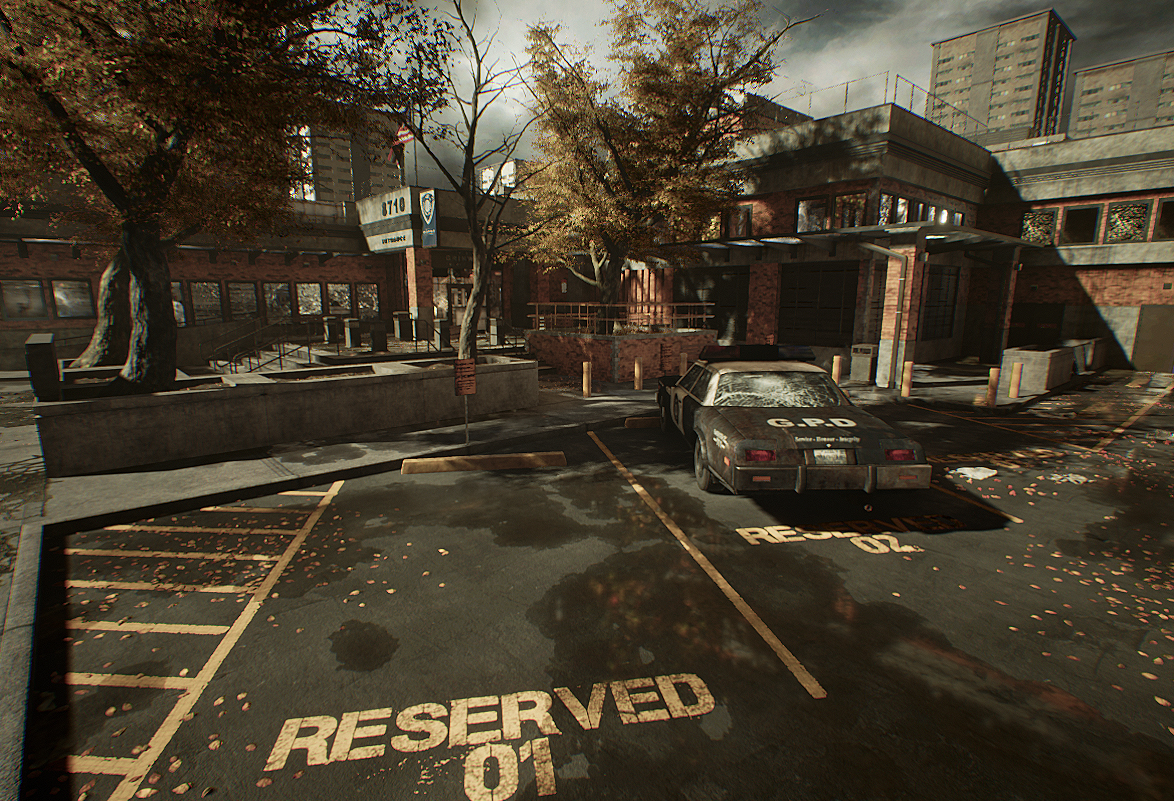
For example, let’s say I had a newspaper on the ground that would always have a blotchy dark shadow on it no matter how many lights were around or where I moved the newspaper. My workaround would be to obscure the shadowy part with another object like a crate or something instead of trying to figure out why this issue was occuring. I would just think to myself “Oh, just another lighting bug that I hope they fix in the next update!”
Thanks to some of those articles I read, I found the culprit. If you’re a Developer, you’ll understand the terminology I’ll be using and I hope that this information helps make your workflow a little smoother!
A) Ideally when an object is Unwrapped, it should stay within the bounding box like so:
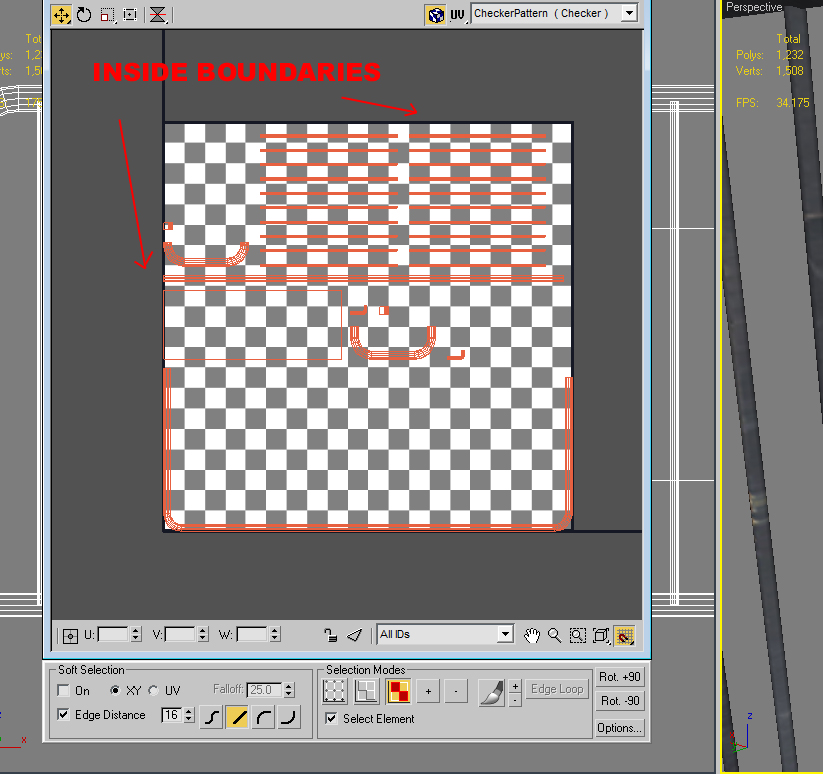
Really, you can lay out your coordinates however you like to take advantage of as much space as possible. I just used an auto-packing feature to do it quickly in this example.
Now what I was doing (one of my old habits) was I was extending my texture coordinates outside of the bounding box as a way to have more tiling on the object.
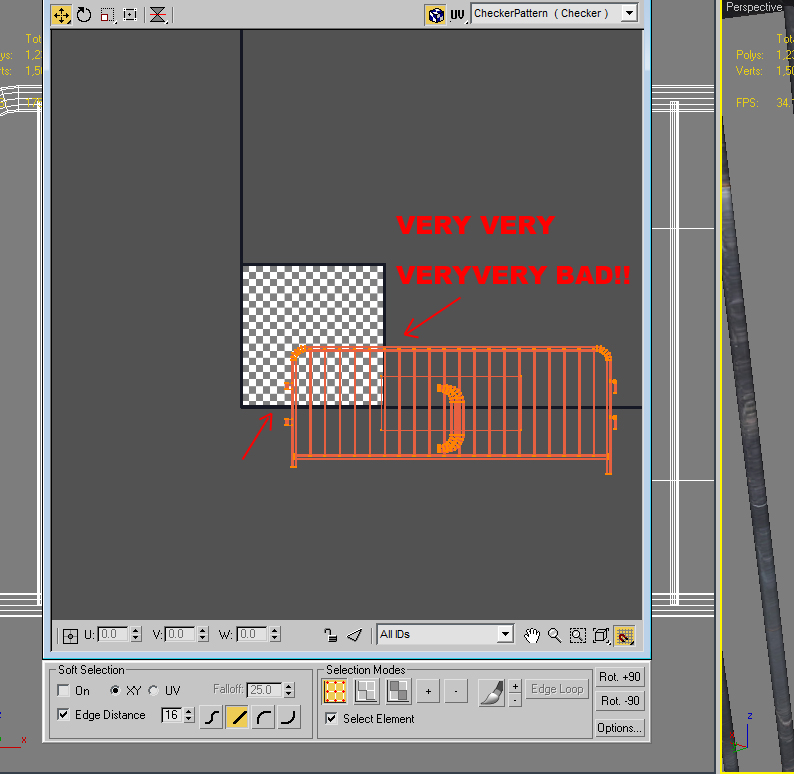
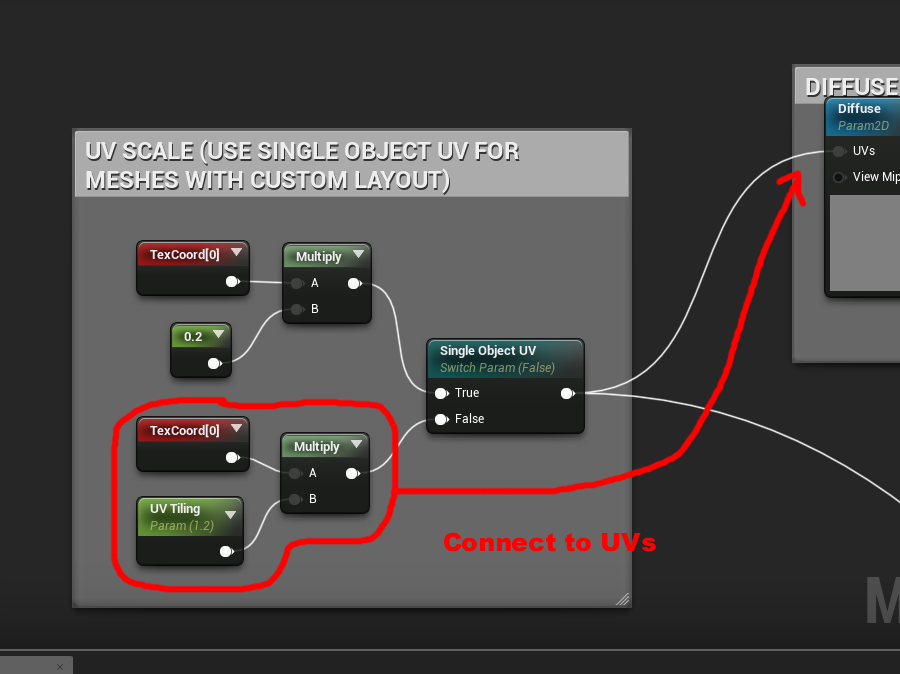
I was completely clueless that this could affect the way the model could be lit inside the engine! Since UE4 generates the lightmap channel automatically, I never would have figured that these coordinates could affect lighting as well! After repacking all my UV’s inside the bounding box, the lighting problems disappeared. So if you need tiling, you will need to set that up in the material itself:
B) Smoothing groups. I always went hog-wild with smoothing and didn’t know that the more smoothing groups I had, the more the vertex count of an object would increase and therefore impact performance.
Below is an object that doesn’t need any smoothing but because of my sloppy techniques, it somehow ended up with 6. So yeah, I don’t know what I was thinking.
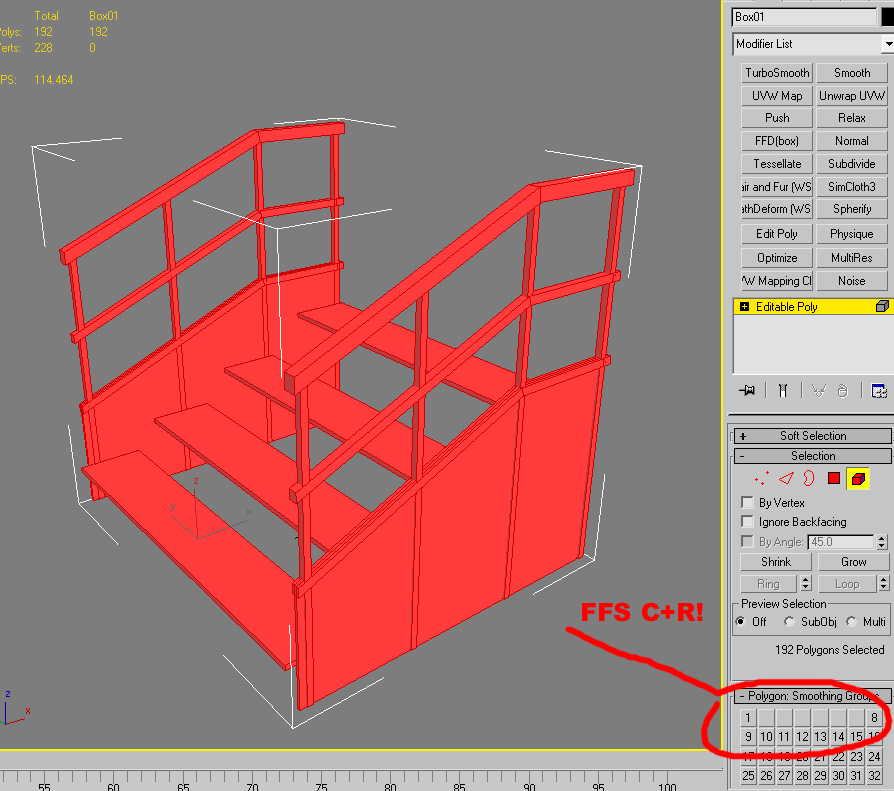
At the end of the day, I don’t think it will make that huge an impact on framerates or anything like that but because of my OCD, I can’t have hundreds of meshes like these sitting around! So for the sake of optimization, keeping things neat and my sanity, I went through and manually fixed all the smoothing groups for all assets.
Now, that in itself wouldn’t have taken long……if I didn’t have over 500 meshes already!

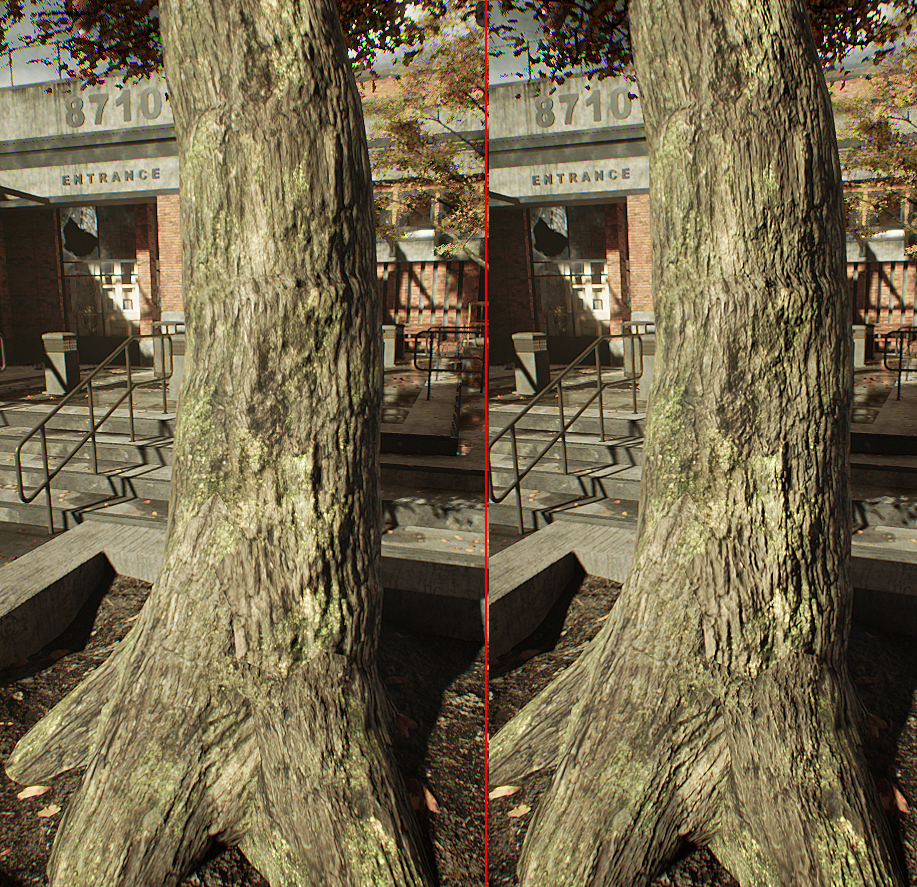
C) Another thing was Normals. I was using pretty small Normal textures (256×256 for most objects, 512×512 for characters) I was doing this because I wanted to save on the file size and assumed that it was a good thing to do. But it turns out that it is far more important to have a bigger Normal texture and a smaller Diffuse texture since all the lighting details are stored in the Normals! I was wondering for a long time why my Normals looked like shit in-game!
So I went back and re-did them all and now the difference really shows. I’ve applied the old Normal texture to the tree to show what it used to look like (left) compared to now (right):
D) Smooth Edges! I also took some time to make improvements here and there. Most of the inorganic models have hard edges and it just always bugged me how sharp these looked (you’ll notice this in a lot of other games too) I found an effective solution was chamfering the edges and applying just one smoothing group. As you can see, it looks far more natural.

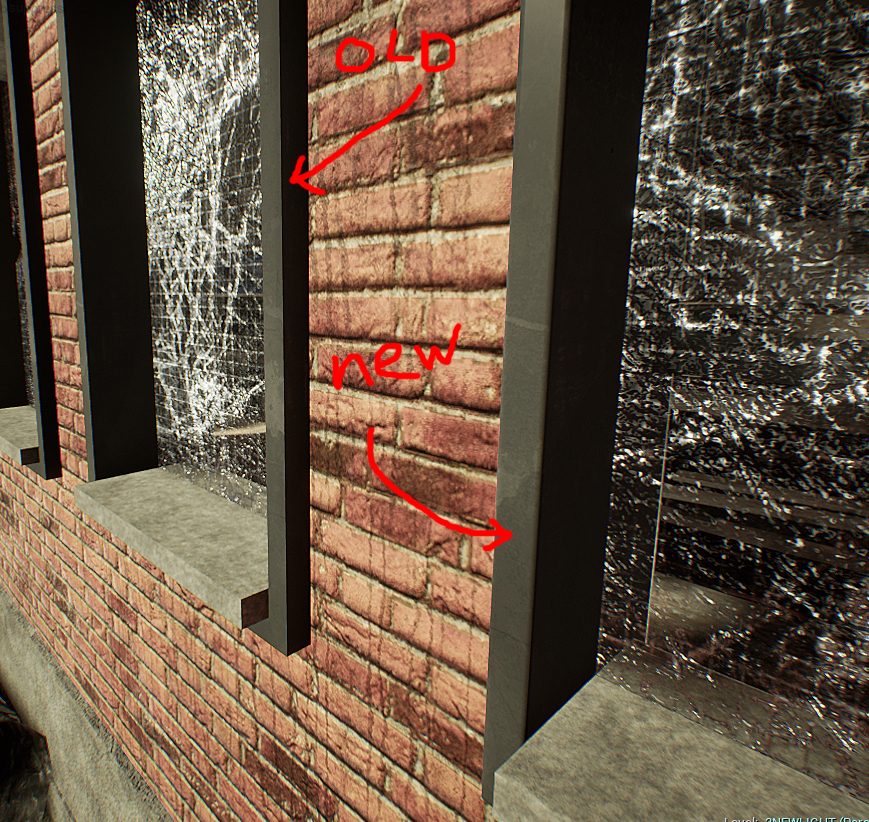
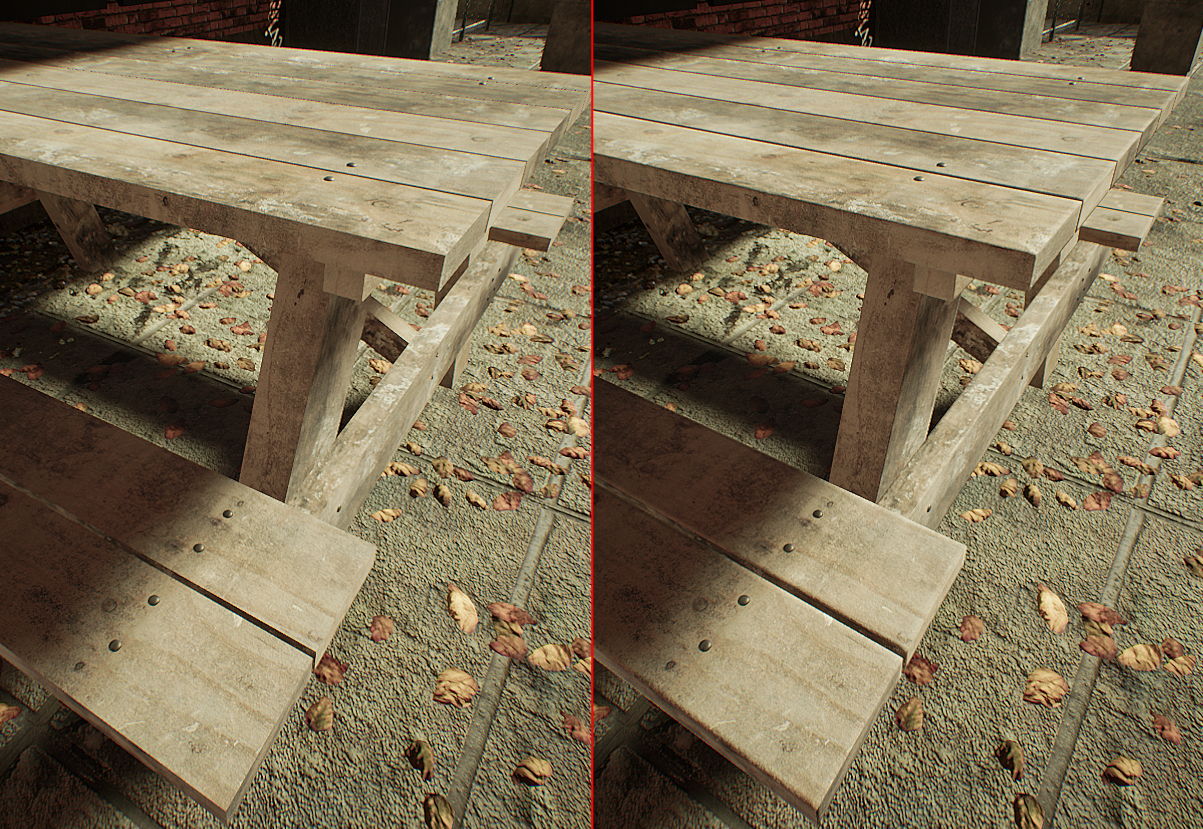
Sometimes it’s very noticeable, other times it’s subtle. I haven’t done this to all the meshes; just the ones that I think need them.


I apologize for being off the radar but as you can see, I’m always working! I consider myself very lucky to have come across those articles when I did. Can you imagine the amount of time and work I would have to spend later trying to fix all this messy shit?!
There is always something new to learn… even though I should have known all of this obvious stuff since I’ve been doing this for nearly 2 decades! I’m such a goddamn noob sometimes!
Comments are closed.


Really impressive work, the edge chamfering really made a significant difference. I’ve encountered the same issue but always tried overcoming it with shaders instead of changes to the model itself but in my past research I couldn’t find a foolproof way of getting that to work universally so that I could throw it at most brushes too. Glad to see you’re still pushing through, the screenshots are looking awesome!
I’ve tried looking for a Shader solution too but no luck so far. You can chamfer models but the problem still exists for BSP which I haven’t completely abandoned. Hopefully they’ll have a solution in future versions of the Engine!
Damn, great stuff going on here, it’s super cool to see you’ve discovered some new techniques for modelling and detailing, it will really make a difference for the end result!
Thanks man!